
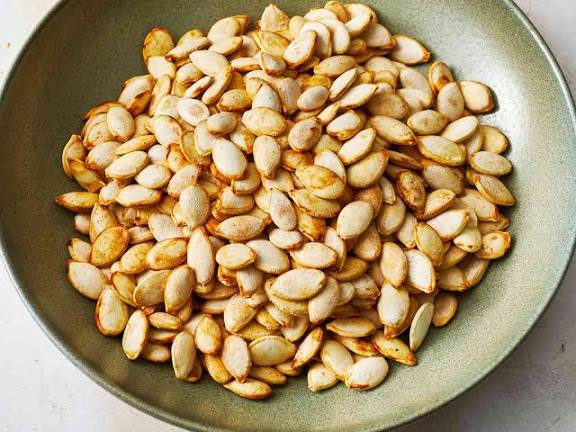
Pumpkin seeds—often dismissed as mere by-products of carving pumpkins—are in fact little nutritional powerhouses. Known also as pepitas, these seeds deliver a satisfying crunch, a delightful nutty flavor, and a raft of health benefits. In this article we’ll explore why roasted pumpkin seeds are worth making, how to prepare them for perfect crispiness, multiple seasoning variations, and tips for storing and enjoying them. Whether you’ve just carved a jack-o-lantern or simply bought raw seeds, you’ll discover how easy it is to turn them into a snack you’ll actually love.

Why Pumpkin Seeds Matter
Nutritional Benefits
• Rich in magnesium, zinc, healthy fats and protein — for example, just one serving offers a significant portion of your daily magnesium needs.
• Contain antioxidants and fiber, especially when eaten with the shell, helping reduce inflammation and support bodily functions.
• Emerging research links regular consumption of pumpkin seeds to improved prostate health, better sleep (thanks to tryptophan and magnesium), lowered blood pressure, and possibly reduced cancer risk.
Why Roasting Makes a Difference
Raw pumpkin seeds are healthy—but roasting elevates the flavor and texture, making them more snack-worthy. According to some research, properly roasting can even enhance the antioxidant capacity of the seeds.
And for many of us, a crunchy, toasted seed is far more appealing than a bland raw one.
How to Roast Pumpkin Seeds: Step-by-Step
Ingredients (for ~ 1½ cups seeds)
- 1 ½ cups raw pumpkin seeds (with hulls or shelled, your choice)
- 2 teaspoons olive oil (or melted coconut, avocado, or nut oil)
- 2 teaspoons fine sea-salt (or adjust to taste)
- Optional: 2 teaspoons spice blend of your choice (see variations below)
Equipment
- Baking sheet
- Parchment paper (optional, for easier cleanup)
- Colander or bowl for rinsing
- Kitchen towels or paper towels for drying seeds
Instructions
1. Preheat & prepare
Preheat your oven to 350 °F (≈ 177 °C). Line a baking sheet with parchment paper (optional) and set aside.
2. Clean the seeds
Scoop seeds from your pumpkin (if you’re carving) or use store-bought raw seeds. Rinse them in a bowl of cold water, gently rubbing between your fingers to remove the stringy pumpkin flesh. The seeds should float.
Tip: For extra cleaning + seasoning, simmer seeds in lightly salted boiling water (~ 5 minutes) before draining. This step helps remove any remaining pulp and season the seeds from within.
3. Dry thoroughly
Spread the rinsed seeds on a kitchen towel or paper towels and pat them dry. Moisture is the enemy of crispiness—skip this and your seeds may steam instead of toast.
4. Oil, season & spread
In a medium bowl, toss the dried seeds with olive oil and salt (plus any additional spice if using). Then spread them out in a single layer on the baking sheet. Single layer = even roasting.
5. Roast & stir
Place the baking sheet in the oven and roast until the seeds are golden brown and fragrant. Typical time: about 12-25 minutes depending on seed size and oven.
- At ~350 °F, 12–15 minutes may suffice for average seeds.
- If your seeds are larger or your oven cooler, up to ~25 minutes might be needed.
Stir the seeds every 5 minutes or so to ensure even browning and to avoid burning.
They’re done when they’re lightly golden, crisp, and emit a toasted-nut scent. Remove from oven and let them cool slightly—they’ll continue to crisp as they cool.
6. Cool & serve
Once cooled, transfer to a bowl and enjoy immediately as a snack, or use as a crunchy topping for salads, soups or yogurt.
Seasoning Variations: Sweet, Savoury & Spice
One of the great joys of roasted pumpkin seeds is how versatile they are in flavour. Below are some favourite seasoning ideas:
Savoury & Spicy
- Chili-lime: Toss seeds with olive oil, a pinch of sea salt, chili powder and a squeeze of fresh lime after roasting.
- Garlic-herb: Use olive oil, kosher salt, minced garlic (or garlic powder), dried oregano and a hint of black pepper.
- Smoky paprika: Use smoked paprika, sea salt and a drizzle of oil—gives a rich, deep flavour.
Sweet & Dessert-Style
- Cinnamon-sugar: Mix melted butter or oil with cinnamon and sugar, toss with seeds, spread on sheet and roast ~15-20 minutes until golden.
- Maple-vanilla: Toss seeds in maple syrup, vanilla extract and a dusting of sea salt before roasting for a subtly sweet treat.
- Pumpkin-spice: Embrace autumn flavours: use pumpkin pie spice, sea salt and olive oil for a warming snack.
Healthy & Minimal
- Simply salted: Oil + fine sea salt = classic and effortlessly delicious. Minimal ingredients, maximum crunch.
- Everything bagel style: After roasting, toss seeds with everything-bagel seasoning for a trendy snack.
Feel free to experiment—once you’ve mastered the method, you can mix and match herbs, spices, or coatings to create your own signature roasted seed flavour.
Extra Tips & Pro Tricks
- Watch the temperature: Higher temperatures (e.g., 425 °F) will yield quicker toasting and deeper browning (12–16 minutes) but require more vigilance.
- Avoid overcrowding: If seeds overlap too much they steam rather than toast. One layer only.
- Dry seeds are crunch seeds: Do not skip the drying step—moisture causes soggy, chewy seeds.
- Stirring matters: Especially if your oven has hot spots—stir or shake about every 5-10 minutes.
- Cool in the pan: After removing from oven, let seeds cool on the sheet for a few minutes before transferring—they’ll crisp up further as they cool.
- Mind the shell vs shelled seeds: Seeds with shells have more fibre; shelled seeds (pepitas) are quicker to eat and still very nutritious.
- Storage: Once fully cooled, store roasted seeds in an airtight container at room temperature for up to a week (or longer in the fridge). They’ll stay crunchy if kept dry.
Why You’ll Love This Recipe
- Low cost, high reward: If you’ve already carved a pumpkin, the seeds would otherwise go to waste. Roasting them turns them into a tasty snack with minimal additional cost.
- Customisable flavour: Whether you like sweet, spicy, salty or bold flavours—you make it your own.
- Nutrient-dense snack: Instead of processed chips or crackers, you’re choosing a crunchy snack with protein, healthy fats, minerals and fibre.
- Great for all seasons: Yes, they’re popular in autumn—but roasted pumpkin seeds are equally great year-round.
- Kid-friendly & fun: Kids can help rinse, season and spread the seeds—makes for a fun kitchen activity.
Suggested Use Cases
- Movie night snack: Swap popcorn for roasted pumpkin seeds—sprinkle lightly with sea salt and your favourite spice.
- Salad topping: A tablespoon of toasted pumpkin seeds gives salad a welcome crunch and nutty flavour.
- Breakfast boost: Sprinkle on oatmeal, yogurt or smoothie bowls for added protein and texture.
- Gift jars: Package cooled roasted seeds in a cute jar, tie with a ribbon—great as a homemade gift.
- Lunchbox addition: Toss a small sealed bag of roasted seeds into kids’ lunches—they’ll love the crunch and you’ll appreciate the nutrition.
Frequently Asked Questions
Q: Can I roast seeds from butternut squash, spaghetti squash or other winter squash?
Yes — the method is the same. Some seeds may be smaller and require less time.
Q: Should I boil or simmer the seeds before roasting?
It’s optional—but many recipes recommend simmering seeds in lightly salted water for ~5 minutes. This helps clean off pulp, season the seeds internally, and improve texture.
Q: What temperature is best for roasting?
There’s some variation: 300–325 °F yields slower, gentle roasting (35-45 minutes).
Alternatively, higher temps like 400–425 °F will roast faster (~12–16 minutes) but require more attention.
Q: Are roasted seeds still as healthy as raw?
Yes—they retain most of their beneficial nutrients. In fact, roasting may enhance antioxidant activity in some cases.
However, any high temp cooking will cause some nutrient loss, so aim for moderate temperatures and avoid burning.
Q: How can I tell when the seeds are done?
When the seeds are lightly golden brown, crisp, and you can smell a nutty aroma. They should crack or crunch easily between your teeth. If they’re chewy or soft, they need a little longer.
Final Thoughts
Roasted pumpkin seeds are a perfect example of turning something ordinary into something extraordinary. With just a little oil, salt and some thoughtful roasting, you can transform humble seeds into a snack that’s crunchy, flavourful, and genuinely good for you. Whether you’re enjoying them straight from the oven, sprinkling them on a salad, or treating them as a homemade gift, you’ll find their appeal is wide and lasting.
Remember: treat your oven, your seeds and your seasoning as allies. Clean them well, dry them fully, roast them at the right heat, and season them with intention. The result? A snack that’s elegant in its simplicity, rich in its nutrition—and truly satisfying.
Now go ahead—gather those pumpkin seeds, line your baking sheet, pick your spice blend—and let the roasting begin! Let me know if you’d like printable recipe cards, more flavour combos (like Asian-style or Indian spice mixes), or ideas on how to incorporate roasted pumpkin seeds into meals in Indonesia or Southeast Asia.